Category Archives: Hardware

Add Cloudflare Dynamic DNS Support on Unifi USG

It seems Unifi USG still doesn’t support Cloudflare Dynamic DNS, even though lots of users voted for this feature.
In the past I’m using dnsomatic to update cloudflare DDNS, but dnsomatic is not working anymore. So I spent sometime to find a solution.

1. Create a config.gateway.json and put it on unifi controller. Then provision USG.
If you don’t know how to create the file, please refer to https://help.ubnt.com/hc/en-us/articles/215458888-UniFi-Advanced-USG-Configuration

{
	"service": {
		"dns": {
			"dynamic": {
				"interface": {
					"<WAN interface eg eth0>": {
						"service": {
							"cloudflare": {
								"host-name": [
									"<insert A record name here eg. usg.example.com>"
								],
								"login": "<CloudFlare E-Mail>",
								"options": [
									"zone=<DNS Zone eg. example.com>"
								],
								"password": "<CloudFlare Global API Key>",
								"protocol": "cloudflare"
							}
						}
					}
				}
			}
		}
	}
}

2. Upgrade ddclient on USG to version 3.9.0.
Save below script as a bash file:

#!/bin/bash
# Run this script as sudo

# Specify the repo and the location of the apt sources list
DEB_REPO="deb http://archive.debian.org/debian/ wheezy main # wheezy #"
APT_SRC="/etc/apt/sources.list"

# Add deb repo to sources list if it isn't there
grep -q -F "$DEB_REPO" "$APT_SRC" || echo "$DEB_REPO" >> "$APT_SRC"

# Run Apt update
apt-get update; apt-get -y install libdata-validate-ip-perl

# Download new ddclient and replace the existing version
cd /tmp
curl -L -O https://raw.githubusercontent.com/ddclient/ddclient/master/ddclient
cp /usr/sbin/ddclient /usr/sbin/ddclient.bkp
cp ddclient /usr/sbin/ddclient
chmod +x /usr/sbin/ddclient

And chomod +x the file and run it with root. Then the script will install libdata-validate-ip-perl as well as ddclient 3.9.0.

3. As we are using standard ddclient, so we have to create a copy of the old ddclient configuration file.

cd /etc/ddclient
cp ddclient_eth0.conf ddclient.conf

4. Then restart ddclient.

/etc/init.d/ddclient

5. Done. From system log, you should be able to see ddclient update cloudflare DDNS now.

fix new iphone can’t sync with outlook.com issue

It seems Microsoft is encourage people to use the app outlook. The app is good, but I still need to sync the contact between my iphone and outlook to get my contacts number.
Spent some time to check this issue, here is the fix:


    Login to outlook.live.com
    In the browser, click on Settings icon (gear at top right) ; scroll down the Quick Settings panel and click on 'View all Outlook settings'
    In the pop-up window, select 'General'; 'Mobile Devices'
    Select the iPhone, note if you have more than one iPhone (e.g. an older device), select the 'Edit' icon (pencil) to check the details including the version, 'OK' to exit details
    Click on the 'Delete' icon (bin) to remove the device
    Power off the iPhone
    Power on the iPhone - device should attempt to re-register with Microsoft
    Open the iPhone Mail app and look for email with subject: "ACTION REQUIRED TO SYNC EMAIL" (note, this email won't appear in the online version of Outlook, only in the iPhone Mail app)
    Scroll down the message and click on: "Continue using this email app".

Can’t create tasks in Synology Active Backup for business

My Synology NAS DS1813+ is running for about 6 years, all good. I used the package “Active backup for business” to backup my AWS server data. Just config rsync and then all good to go.

The backup job was running fine for the past a few years. But I noticed that the task stopped since Christmas. When I tried to re-create the task, I got below errors:

And I also found below error message in /var/log/messages:

2019-02-06T13:44:31+11:00 NAS synoscgi_SYNO.ActiveBackup.Task_1_create_agentless[24911]: ========== Exception Class [synoabk::exception::NotSupportACL] ==========
2019-02-06T13:44:31+11:00 NAS synoscgi_SYNO.ActiveBackup.Task_1_create_agentless[24911]: [ERROR] task.cpp:1816(24911,140290662164224) Code: [55040] What: [utility.cpp:205(24911) SYNOACLGet failed. sharePath=[/volume1/Software], synoerr=[0xD700]]
2019-02-06T13:44:31+11:00 NAS synoscgi_SYNO.ActiveBackup.Task_1_create_agentless[24911]: #0 (24911) /var/packages/ActiveBackup/target/webapi/../lib/libsynoabk.so.1(synoabk::exception::Exception::_setBacktrace()+0x40) [0x7f9807983800]
2019-02-06T13:44:31+11:00 NAS synoscgi_SYNO.ActiveBackup.Task_1_create_agentless[24911]: #1 (24911) /var/packages/ActiveBackup/target/webapi/../lib/libsynoabk.so.1(synoabk::exception::Exception::Exception<char const*, int&>(int, char const*, char const*&&, int&)+0x73) [0x7f980799e673]
2019-02-06T13:44:31+11:00 NAS synoscgi_SYNO.ActiveBackup.Task_1_create_agentless[24911]: #2 (24911) /var/packages/ActiveBackup/target/webapi/../lib/libsynoabk.so.1(void synoabk::exception::throwSdkError<char const (&) [12], int, int, char const*>(char const*, char const (&) [12], int&&, int&&, char const*&&)+0xb2) [0x7f98079cc8d2]
2019-02-06T13:44:31+11:00 NAS synoscgi_SYNO.ActiveBackup.Task_1_create_agentless[24911]: #3 (24911) /var/packages/ActiveBackup/target/webapi/../lib/libsynoabk.so.1(synoabk::set_target_share_acl(synoabk::Path const&, unsigned int)+0x139) [0x7f98079c9a79]
2019-02-06T13:44:31+11:00 NAS synoscgi_SYNO.ActiveBackup.Task_1_create_agentless[24911]: #4 (24911) /var/packages/ActiveBackup/target/webapi/SYNO.ActiveBackup.so(+0xfd5b0) [0x7f980539d5b0]
2019-02-06T13:44:31+11:00 NAS synoscgi_SYNO.ActiveBackup.Task_1_create_agentless[24911]: #5 (24911) /var/packages/ActiveBackup/target/webapi/SYNO.ActiveBackup.so(ActiveBackupHandle::TaskCreateAgentless_v1()+0x1d26) [0x7f98053a2bb6]
2019-02-06T13:44:31+11:00 NAS synoscgi_SYNO.ActiveBackup.Task_1_create_agentless[24911]: #6 (24911) /var/packages/ActiveBackup/target/webapi/SYNO.ActiveBackup.so(ActiveBackupHandle::Process()+0x575) [0x7f9805349415]
2019-02-06T13:44:31+11:00 NAS synoscgi_SYNO.ActiveBackup.Task_1_create_agentless[24911]: #7 (24911) /var/packages/ActiveBackup/target/webapi/SYNO.ActiveBackup.so(Process(SYNO::APIRequest*, SYNO::APIResponse*)+0x38) [0x7f98053d8ec8]
2019-02-06T13:44:31+11:00 NAS synoscgi_SYNO.ActiveBackup.Task_1_create_agentless[24911]: #8 (24911) /lib/libwebapi-DSM5.so(SYNO::APIRunner::ProcessLib(SYNO::APIRequest*, SYNO::APIResponse*)+0x1641) [0x7f98174b8f21]
2019-02-06T13:44:31+11:00 NAS synoscgi_SYNO.ActiveBackup.Task_1_create_agentless[24911]: #9 (24911) /lib/libwebapi-DSM5.so(SYNO::APIRunner::Process(SYNO::APIRequest*, SYNO::APIResponse*)+0x165) [0x7f98174ba145]
2019-02-06T13:44:31+11:00 NAS synoscgi_SYNO.ActiveBackup.Task_1_create_agentless[24911]: #10 (24911) synoscgi_SYNO.ActiveBackup.Task_1_create_agentless() [0x407c03]
2019-02-06T13:44:31+11:00 NAS synoscgi_SYNO.ActiveBackup.Task_1_create_agentless[24911]: #11 (24911) synoscgi_SYNO.ActiveBackup.Task_1_create_agentless() [0x407e66]
2019-02-06T13:44:31+11:00 NAS synoscgi_SYNO.ActiveBackup.Task_1_create_agentless[24911]: #12 (24911) /lib/libsynodaemon.so.6(synodaemon::process::ChildProc::Run()+0x5ab) [0x7f9817055a9b]
2019-02-06T13:44:31+11:00 NAS synoscgi_SYNO.ActiveBackup.Task_1_create_agentless[24911]: #13 (24911) /lib/libsynodaemon.so.6(synodaemon::process::ChildProc::Start()+0x24d) [0x7f981705508d]
2019-02-06T13:44:31+11:00 NAS synoscgi_SYNO.ActiveBackup.Task_1_create_agentless[24911]: #14 (24911) /lib/libsynodaemon.so.6(synodaemon::worker::Worker<synodaemon::process::ChildProc>::Start()+0x2e) [0x7f981705738e]
2019-02-06T13:44:31+11:00 NAS synoscgi_SYNO.ActiveBackup.Task_1_create_agentless[24911]: #15 (24911) /lib/libsynodaemon.so.6(synodaemon::thread::ProcessPoolMonitor::UpdateWorkerStatus(pollfd*, unsigned long)+0xcfe) [0x7f9817061a4e]
2019-02-06T13:44:31+11:00 NAS synoscgi_SYNO.ActiveBackup.Task_1_create_agentless[24911]: #16 (24911) /lib/libsynodaemon.so.6(synodaemon::thread::ProcessPoolMonitor::Run()+0x1f4) [0x7f9817061dc4]
2019-02-06T13:44:31+11:00 NAS synoscgi_SYNO.ActiveBackup.Task_1_create_agentless[24911]: #17 (24911) /lib/libsynodaemon.so.6(synodaemon::thread::Runnable::Runner(void*)+0xa) [0x7f9817062c0a]
2019-02-06T13:44:31+11:00 NAS synoscgi_SYNO.ActiveBackup.Task_1_create_agentless[24911]: #18 (24911) /lib/libpthread.so.0(+0x72c4) [0x7f981606f2c4]
2019-02-06T13:44:31+11:00 NAS synoscgi_SYNO.ActiveBackup.Task_1_create_agentless[24911]: #19 (24911) /lib/libc.so.6(clone+0x6d) [0x7f9815dad10d]
2019-02-06T13:44:31+11:00 NAS synoscgi_SYNO.ActiveBackup.Task_1_create_agentless[24911]: (24911) [error] task.cpp:1817 TaskCreateAgentless: failed to prepare target
2019-02-06T13:44:31+11:00 NAS synoscgi_SYNO.ActiveBackup.Task_1_create_agentless[24911]: (24911) [error] synoabk::exception::Exception(HÈHכ]A\A]ÐHp좦.)
2019-02-06T13:44:31+11:00 NAS synoscgi_SYNO.ActiveBackup.Task_1_create_agentless[24911]: (24911) [error] exception: [HÈHכ]A\A]ÐHp좦.]

Tried to reinstall active backup, still the same.
After investigation, I found that this issue was caused by permission structure of my NAS share folder.
My NAS was coming with DSM 4, and after several major version upgrade, now it’s running DSM 6.2. It seems in the past DSM was using UNIX-like ACL and then from DSM 5.* it’s moved to Windows Like ACLs.
So I need to upgrade my NAS to convert share folder permission to Windows ACL:

After convert, Active backup starts working again.

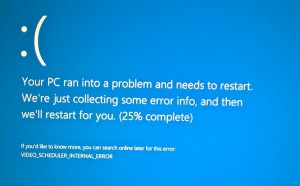
Fix”Video Schedule Internal Error”blue screen problem

I just set up a new Z170/6700K machine which is running windows 10. But I always got the blue screen with error message Video_Schedule_Internal_Error.

bluescreen

After investigation, I found that this problem was caused by the latest Intel Video card driver win64_15407.4279.
The workaround is to change the shared memory settings for the Intel Video card. You need to assign 128M memory for per 8G memory. It means:

If you have 8G memory, assign 128M memory for the Video card;
If you have 16G memory, assign 256M memory for the Video card;
If you have 32G memory, assign 512M memory for the Video card;

Crossflashing an IBM M1115 RAID controller to LSI firmware

1. Download the flash package, and unzip it to folder SAS
http://forums.laptopvideo2go.com/topic/29059-lsi-92xx-firmware-files/

2. Download latest firmware from LSI website.

http://www.lsi.com/products/host-bus-adapters/pages/lsi-sas-9211-8i.aspx#tab/tab4

At this time, I’m using 9211-8i_Package_P18_IR_IT_Firmware_BIOS_for_MSDOS_Windows.

3. Unzip the firmware package, and copy below files to folder SAS created in step 1
2118ir.bin from FirmwareHBA_9211_8i_IR
2118it.bin from FirmwareHBA_9211_8i_IT
mptsas2.rom from sasbios_rel
sas2flsh.exe from sas2flash_dos_rel

4. Create a DOS bootable USB drives, you can download a tool from below link:
http://rufus.akeo.ie/

5. Turn machine off, and grab the SAS address of the card, it’s on the back on a green sticker (ie 500605B0xxxxxxxx)

6. Use the USB drive to boot the computer, and flash the firmware

Convert LSI9240(IBM M1015) to a LSI9211-IT mode
Type in the following exactly:
megarec -writesbr 0 sbrempty.bin
megarec -cleanflash 0
<reboot, back to USB stick >
sas2flsh -o -f 2118it.bin -b mptsas2.rom (sas2flsh -o -f 2118it.bin if OptionROM is not needed)
sas2flsh -o -sasadd 500605bxxxxxxxxx (x= numbers for SAS address)
<reboot>
Done!

Convert IBM M1115 to a LSI9211-IR mode
Type in the following exactly:
megarec -writesbr 0 sbrempty.bin
megarec -cleanflash 0
<reboot, back to USB stick>
sas2flsh -o -f 2118ir.bin -b mptsas2.rom
sas2flsh -o -sasadd 500605b0xxxxxxxx (x= numbers for SAS address)
<reboot>
Done!

Convert LSI9211-IT or IR to LSI9211 IR or IT
Type in the following exactly:
Megarec -cleanflash 0
<reboot, back to USB stick>
sas2flsh -o -f 2118ir.bin -b mptsas2.rom (2118it.bin = IT mode Firmware, change according to which way to flash)
sas2flsh -o -sasadd 500605bxxxxxxxxx (x= numbers for SAS address)
<reboot>
Done!

Convert LSI9211-IT/IR back to IBM M1115
Type in the following exactly:
Megarec -cleanflash 0
Megarec -writesbr 0 sbrm1015.bin
<reboot, back to USB stick>
Megarec -m0flash 0 0061_lsi.rom (for latest LSI firmware, also included 2x IBM roms too, just change name)
<reboot>
Done!

7. You may get an error message “ERROR: Failed to initialize PAL. Exiting program.” when you try to flash the card, it means that you’re unable to do this from DOS. You have to get a UEFI shell (https://edk2.svn.sourceforge.net/svnroot/edk2/trunk/edk2/EdkShellBinPkg/FullShell/X64/Shell_Full.efi worked for me on my 64 bit CPU) and put it on your usb stick. Then you have to boot into UEFI shell, and use below command

sas2flash.efi -o -f 2118it.bin -b mptsas2.rom
sas2flash.efi -o -sasadd 500605bxxxxxxxxx 

光驱消失时的解决方法

症状:
我的电脑中光驱消失,设备管理器中有光驱,但是前面有叹号。

解决方法:
1.先卸载光驱
2.进入注册表("运行" REGEDIT). 找到下列分支HKEY_LOCAL_MACHINESYSTEMCurrentControlSetControlClass{4D36E965-E325-11CE-BFC1-08002BE10318}
2、应该能看到有以下主键:"UPPER FILTER" 和 "LOWER FILTER"。 把值都删除。
3、重启系统后,光驱能正常工作。