Tag Archives: disk

expand AWS EC2 FreeBSD ZFS disk

For testing purpose, I setup a Freebsd instance on AWS, which is using zfs on root.
And then I add 10G disk space to the root volume. Even though I enabled auto-expand for zroot, it seems the 10G space is not added to system. Here are the steps to expand the disk for zroot:

1. Reboot the server.  Even though it’s said that reboot is not necessary, I suggest to reboot the server to make sure server can recognize the new size.

2. As the disk size change, we need to fix the GPT partition table first.

gpart recovery ada0

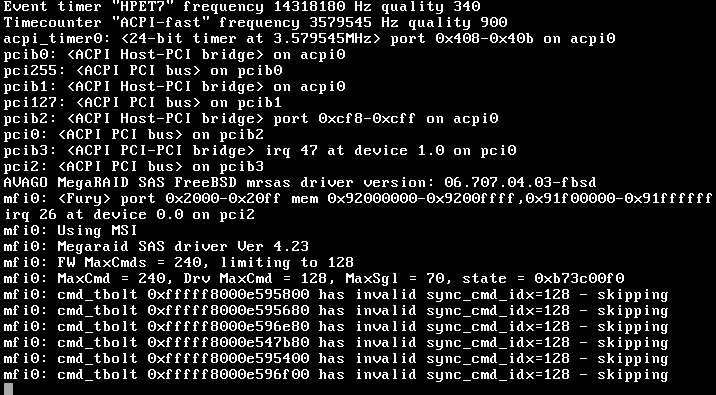
3. Some documents said can use “zpool online -e” to expand the disk. As shown in above picture, the command can’t auto update GPT and assign the space to zfs partition.

4. We need to use gpart to update GPT first, then expand the zfs partition.

#gpart resize -i 2 ada0
#zpool online -e zrrot /dev/adap2

Increasing disk/zpool size of FreeBSDZFS disks in Linode

I’m running a FreeBSD instance in Linode. And FreeBSD is not the official supported OS in Linode.The disk type is set to raw to install FreeBSD.

And recently Linode upgraded my instance and the disk size is increased from 40G to 80G.

But when I login to the system, I found that my zpool is still 40G. But the disk is shown as 80G.

# gpart show
=>       34  100663229  ada0  GPT  (80G) [CORRUPT]
         34          6        - free -  (3.0K)
         40       1024     1  freebsd-boot  (512K)
       1064        984        - free -  (492K)
       2048    4194304     2  freebsd-swap  (2.0G)
    4196352   96464896     3  freebsd-zfs  (46G)
  100661248       2015        - free -  (1.0M)

I tried to enable zfs autoexpand on my zpool, the same. Then how to increase the disk/zpool size?

First, re-write disk metadata

# gpart recover ada0
ada0 recovered

After this, gpart can show the real disk space info

#:~ # gpart show
=>       40  167772080  ada0  GPT  (80G)
         40       1024     1  freebsd-boot  (512K)
       1064        984        - free -  (492K)
       2048    4194304     2  freebsd-swap  (2.0G)
    4196352   96464896     3  freebsd-zfs  (46G)
  100661248   67110872        - free -  (32G)

Then, expand zfs partition

# gpart resize -i 3 ada0
ada0p3 resized

Then, expand the zpool

zpool online -e zroot /dev/ada0p3

Done!

#:~ # df -h /
Filesystem            Size    Used   Avail Capacity  Mounted on
zroot/ROOT/default     74G     29G     45G    39%    /

Don’t forget to write zfs info to disk

gpart bootcode -b /boot/pmbr -p /boot/gptzfsboot -i 1 ada0

FreeBSD: use mrsas driver to replace mfi driver

My server got a Dell PERC H330 raid card, and I made it’s working in HBA mode to make sure that it can get best performance under FreeBSD with zfs.
But every time when I boot the server, I’ll get below error message and it take a long time to pass the disk check stage.

1

After research, it seems this timeout error was caused by the old mfi driver.
And LSI has released a new mrsas driver for FreeBSD. So It’s better to switch the driver from mfi to mrsas.

First, add below line into /boot/loader.conf

mrsas_load="YES"

And then add below device hint into /boot/device.hints . This line is very important. Without this device hint, FreeBSD will use the old mfi driver for raid card even though you enabled maras drvier.

hw.mfi.mrsas_enable="1"

And then, add below line into /boot/loader.conf to disable disk id identity.

kern.geom.label.gptid.enable="0"
kern.geom.label.disk_ident.enable="0"

Without above two line, after you switch from mfi to mrsas, all the disks will be shown as diskid-*****************。

And don’t forget to update /etc/fstab to change the swap partition from mfi*p* to da*p*. Otherwise you’ll lose your swap partition.

Then, reboot your server, and enjoy.

Fix VCSA 6.0 disk issue — “unknow command shell.set”

In my home lab I’m using Lenovo M900 tiny to run ESX 6.0 and using Synology DS1813+ to provide the ISCSI LUN.
And I’m using VCSA as my vCenter server and put it on the iSCSI lun.

Today I updated my DS1813+ to DSM 6.0 update 1, during the update, I reboot my synology nas. And it seems ESX lost connecting to the iSCSI LUN and my VCSA was dead.

Tried to restart VCSA, it always failed and asked my to run fsck.
1

At first, I want to run fsck in VCSA shell. But the wired thing is that when I run command “shell.set –enable True”, it told me this command doesn’t exist..
2

It seems that the volumes are in read-only and the shell is dead.
Don’t worry, let’s fix it.
Please follow below steps:

  1. stop VCSA machine
  2. add the iso of RHEL7 installation CD to the (actually as CD/DVD of the machine and modified boot order to start from the CD
  3. boot from CD
  4. enter shell of LiveCD
  5. issue the following commands (to see that logical volumes are OK)
    pvscan
    lvscan
    fsck -fvy /dev/log_vg/log
  6. repeat step 5 to check all the volumes

3

After finished, remove the ISO and reboot the VM.
You will find VCSA is back:)

Understanding Citrix Performance Issues

Bottleneck: provisioning services. Customers note there is excessive Network I/O and CPU utilization.
Bottleneck: vDisk fragmentation or server virtual instances. Customer notes there is excessive page file utilization and disk I/O.
Bottleneck: delays mounting new vDisks. Check for excessive Network and Disk I/O on delivery controllers.
Bottleneck: delivery controllers. Check for excessive historical CPU utilization.
Bottleneck: slow application enumeration. Check for excessive disk and network I/O on the data collectors.
Bottleneck: slow session creation noted within the director console: Check for historical CPU and Memoyr consumption, consider adding VCPU and memory when/where needed.
Bottleneck: higher than expected user logons. Check for high CPU and/or network utilization (not historical but may trend at random intervals). Add processing or new delivery controller if necessary to handle the expected loads.
Bottleneck: issues with local host cache (LHC). Disk and Page File I/O in excess can cause unanticipated issues with LHC. Alert and adjust when/where needed.
Bottleneck: Processor intensive apps. Check questionable servers for larger disk I/O and page file utilization. Consider adding more VCPU’s and/or memory to offset the demand on disk and page file.
Bottleneck: vDisk and/or Provisioning Services. Check for higher than normal CPU and/or Memory consumption as a deficiency will slow down the loading of vDisks and caching via Provisioning Services (PVS).
Bottleneck: Web interface authentication. Consider adding more memory and looking at network utilization trends. It may be necessary to either add more memory or to add an additional WI to your GSLB URL.
Bottleneck: slow PXE and vDisk. Check for memory and/or network utilization and consider addresssing depending on noted trends.
Bottleneck: target device latency. Check CPU and network I/O for spikes and/or trending issues.